Table of Contents
- Step 1: Run a Pre-Use Boom Lift Hydraulic Maintenance Checklist
- Step 2: Check Hydraulic Fluid Level and Condition
- Step 3: Confirm the Correct Boom Lift Hydraulic Oil Type
- Step 4: Replace Hydraulic Fluid and Filters on Schedule
- Step 5: Perform a Boom Lift Hydraulic Hose Inspection
- Step 6: Boom Lift Hydraulic Leak Troubleshooting and Seal Wear Checks
- Step 7: Keep Components Clean and Lubricate Joints and Pivot Points
- Conclusion: When to Call a Qualified Technician
- Frequently Asked Questions
Last Updated: October 14, 2026
Step 1: Run a Pre-Use Boom Lift Hydraulic Maintenance Checklist
Learning how to maintain boom lift hydraulics starts before the engine turns over. A pre-use walkaround catches most problems while they are cheap to fix.

Boom lift hydraulic maintenance means checking fluid, hoses, seals, and fittings before and during operation. It takes ten minutes a day; skipping it turns a small weep into a burst line and a lost shift.
Daily Walkaround Items
- Check the ground under the machine for fresh fluid spots
- Look at every visible hose for cracks, chafing, or bulges
- Confirm the fluid level in the sight glass or reservoir
Weekly and Monthly Checklist Additions
Weekly, wipe cylinder rods and check for scoring. Monthly, inspect fittings for weeping, check the reservoir breather, and log operating hours.
Photograph the fluid level and any wet spot with your phone each week. When a leak starts slowly, the photos show you exactly when it began, which saves diagnostic time later.
Step 2: Check Hydraulic Fluid Level and Condition
Fluid level and condition tell you more about a boom lift’s health than any other check.
Good fluid is clear to amber and smells neutral. Milky fluid has moisture; dark or burnt-smelling fluid has overheated.
- Milky fluid: water contamination, often from condensation
- Dark or burnt-smelling fluid: overheating or a failing pump
- Fluid with grit or metal flecks: internal wear, needs a professional look
Never top off with a different fluid type just to get through a shift. Mixing oils can cause foaming, air in the system, and erratic boom movement.
Step 3: Confirm the Correct Boom Lift Hydraulic Oil Type
The correct boom lift hydraulic oil type is whatever the manual specifies for your exact model, there is no universal substitute. This is the most common mistake we see on site.
Most manufacturers specify fluid based on operating temperature range and hydraulic components. Some call for standard anti-wear oil; others require a specific viscosity grade for cold or hot climates.
Check the manual or the decal on the reservoir. If the decal is missing, manufacturer documentation and operator manuals and the equipment maker’s service literature are the places to confirm the spec.
Topping off with the wrong oil can cause seal swelling and leaks that cost far more than the correct fluid. If you cannot confirm the spec, do not add anything.
Step 4: Replace Hydraulic Fluid and Filters on Schedule
There is no universal fluid-change interval for a boom lift. Fluid type, reservoir capacity, filter part number, and service interval all vary by make, model, and boom configuration, a 40-foot towable and a 120-foot rough-terrain unit do not share a schedule.
The only reliable source is the operator manual and service literature for your exact serial number. If the manual is missing, request it from the manufacturer or dealer before scheduling anything. Do not borrow an interval from a similar-looking machine.
What Actually Drives the Interval
Most manufacturers set the baseline interval in operating hours, then shorten it for severe conditions:
- Baseline interval: as printed in the manual, measured in operating hours
- Dusty, gritty, or high-debris environments: shorten the interval and inspect the breather more often
- High ambient heat or continuous heavy-duty cycling: shorten the interval and watch fluid temperature
Fluid Condition Is a Trigger, Not Just a Level
Level checks tell you volume; condition checks tell you whether the fluid still does its job. Pull a sample when the machine is cool and view it in a clear container against white.
- Clear to amber, neutral smell: normal
- Milky or cloudy: water or moisture contamination, often from condensation in a partially filled reservoir
- Dark, varnished, or burnt smell: overheating or a failing pump
A simple field check is a blotter test: place a drop on clean white paper and let it spread. A dark ring around a lighter center suggests contamination or oxidation, a fast, cheap early warning.
Filter Service
Replace the filter element every fluid change and inspect the housing for debris each interval. If your machine has a bypass indicator, check it during the walkaround, a popped indicator means the system is bypassing unfiltered fluid.
Cut the old filter open when you can. Debris in the pleats tells you what is wearing: metal flecks point to pumps or motors, rubber fragments to hose or seal breakdown, sludge to contamination ingress.
| Service Task | Typical Trigger | What to Check |
|---|---|---|
| Fluid level | Every pre-use check | Sight glass or reservoir mark, machine level, booms stowed |
| Fluid condition | Weekly and after any overheat event | Color, smell, clarity, blotter test |
| Fluid change | Per manual hours, shortened for severe duty | Contamination, moisture, operating hours since last change |
| Filter replacement | Every fluid change, plus per manual hours | Debris in the housing, bypass indicator |
| Filter inspection | Monthly | Pleat debris, seal condition, housing cleanliness |
| Sample analysis | Annually or after any suspected event | Lab report on water, particle count, viscosity |
Keep a Log That Survives an Audit
A maintenance log proves the interval was followed, spots recurring faults, and hands a technician real history instead of a guess. Log at minimum:
- Date and operating-hour reading at each service
- Fluid type and quantity added or replaced
- Filter part number and change date
Never top off with a different fluid type just to get through a shift. Mixing incompatible oils can cause foaming, seal swelling, and erratic boom movement that costs far more than the correct fluid.
Step 5: Perform a Boom Lift Hydraulic Hose Inspection
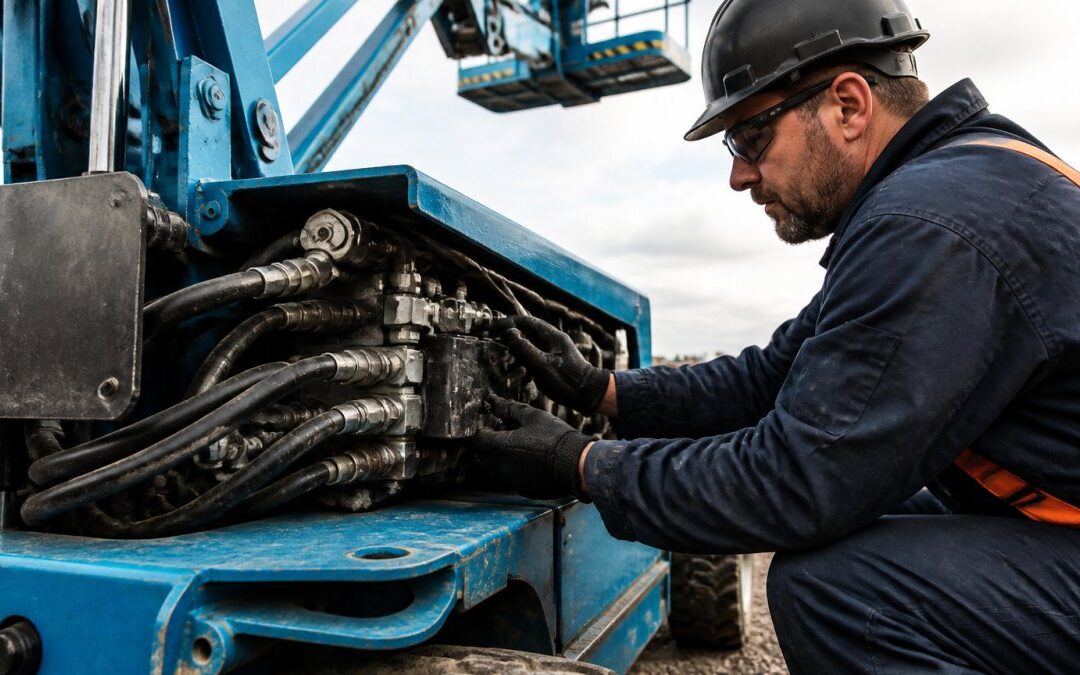
A boom lift hydraulic hose inspection is a hands-on check of every line, fitting, and connection you can safely reach.
With the machine off and booms stowed, run your hand along each hose for soft spots, bulges, or stiff sections.
Forklift Down? Call Us Right Away →
- Replace any hose with a blister, cut, or exposed reinforcement
- Tighten or reseal weeping fittings, but do not overtighten
- Reroute or sleeve hoses that rub against metal
A hose that fails under pressure can spray hot fluid. That is a burn hazard and an environmental spill at the same time.
Step 6: Boom Lift Hydraulic Leak Troubleshooting and Seal Wear Checks
Many guides tell you to ‘check for leaks.’ Very few tell you how to find the source safely or when to stop.
Stop-Work Rules Before You Touch Anything
Hydraulic systems store pressure even when the machine is off and booms are stowed. A pinhole leak can inject fluid under the skin, and injection injuries are a medical emergency that can lead to amputation. Treat every line as pressurized until you have personally verified otherwise.
Stop work and call a qualified technician if any of the following is true:
- You cannot find the depressurization procedure in the manual
- You see a fine mist or pinhole spray from any line or fitting
- Fluid has contacted skin under pressure, seek medical attention immediately and tell the provider it was hydraulic fluid
Depressurization Basics
Before any hands-on inspection, follow the manufacturer’s stored-pressure release procedure exactly: lower the booms, shut down, cycle all controls to bleed residual pressure, and let the system cool. Never crack a fitting or loosen a line to ‘check’ for pressure. If you are not trained on your model’s procedure, stop and call a technician.
Step-by-Step Leak Diagnosis
Work from the outside in, and clean as you go. Fluid follows gravity and airflow, so the wet spot on the ground is often not the source.
- Wipe everything down. Clean the suspect area with lint-free rags so you have a dry baseline.
- Inspect static, machine off. Look for wet rings at fittings, weeping at crimps, and film on cylinder rods. A dry machine that weeps overnight points to a static seal or fitting.
- Inspect under pressure, from a safe distance. With the machine running and the booms stowed, watch from outside the hazard zone. Do not put your hands near a pressurized line.
- Cycle each function one at a time. Boom up, boom down, telescope, rotate, and any attachment function. Note which function produces the leak, that narrows the circuit.
- Check the usual suspects in order. Cylinder rod seals, pump shaft seals, valve bank spools and O-rings, hose crimps, and fitting threads.
- Trace the trail. Follow the fluid uphill and upwind from the wet spot. A leak at the top of the boom can show up on the ground under the turret.
Reading the Leak
Different leaks point to different causes. Match the symptom to the likely source before you replace anything.
- Loose fitting: wet ring at the threads or a drip that stops when the system cools. Often a torque issue, not a failed part.
- Damaged hose: blister, cut, chafe mark, or exposed reinforcement. Replace, do not patch.
- Worn rod seal: thin film on the cylinder rod that reappears after you wipe it. Often worse when the cylinder is extended.
Seal Wear Checks
Seals fail from heat, contamination, and age, in that order. Check cylinder rods for scoring, pitting, or a dull finish, a damaged rod destroys a new seal fast. Check for weeping past the wiper, and check the reservoir breather: a clogged breather pressurizes the reservoir and pushes fluid past seals that would otherwise hold.
Most hydraulic leaks trace back to a worn seal or a loose fitting, not a failed component. Find the source before you replace anything, and never crack a fitting to ‘check’ for pressure.
Hydraulic injection injuries are a medical emergency. If fluid penetrates the skin, seek immediate care and tell the provider it was hydraulic fluid under pressure, even if the wound looks minor.
Step 7: Keep Components Clean and Lubricate Joints and Pivot Points
Cleanliness and lubrication stretch equipment lifespan the most. Dirt is the enemy of every hydraulic component on a boom lift.
Wipe cylinder rods before and after use, cap open ports during service, and keep the reservoir breather clean so it does not pull dust into the system.
Lubrication covers the joints, bearings, hinges, and pivot points that carry the boom’s weight.
- Wipe rods clean after every shift
- Cap open ports during any service work
- Grease all pivot points on schedule
OSHA guidance on powered industrial truck and aerial lift safety treats pre-use inspection as a core requirement, not a suggestion.
Conclusion: When to Call a Qualified Technician
Some hydraulic work belongs in your shop: fluid checks, hose inspections, greasing, and filter swaps are fair game for a trained operator. Other jobs are not.
Call a qualified technician when you see metal in the fluid, a pump is noisy or overheating, a cylinder drifts under load, or you cannot find a leak source.
CSC Forklift Repair provides expert maintenance and repair services designed to keep your equipment running at peak performance.
Frequently Asked Questions
How often should boom lift hydraulic fluid and filters be checked?
Check hydraulic fluid level and condition before every shift as part of your pre-use inspection. Replace filters at the interval your manufacturer specifies, which is typically based on operating hours (often every 250 to 500 hours) or annually, whichever comes first. Fluid changes usually follow a longer interval, such as every 1,000 to 2,000 hours, but dusty or high-cycle environments shorten that window. Always confirm the exact schedule in your model’s service manual, because intervals vary by manufacturer and hydraulic system design.
What oil should you use for a boom lift hydraulic system?
Use the hydraulic oil type your manufacturer specifies in the service manual. Most boom lifts run on ISO VG 32 or ISO VG 46 anti-wear hydraulic fluid, but the correct grade depends on your climate and the pump’s requirements. Never mix different fluid types or brands without checking compatibility, because incompatible additives can cause foaming, seal damage, or reduced lubrication. If you are unsure which boom lift hydraulic oil type fits your machine, contact a qualified technician before adding fluid.
What should you do if a boom lift hydraulic hose is leaking?
Stop operating the lift immediately and lower the platform safely. Hydraulic systems hold stored pressure even after shutdown, so never loosen fittings or attempt repairs without depressurizing the system per the manufacturer’s procedure. Inspect the hose for cracks, abrasion, or bulges, and check fittings for tightness. If the leak comes from a damaged hose or worn seal, replace the component rather than patching it. For persistent leaks or leaks near the cylinder or pump, call a qualified technician to diagnose and repair the issue.
What are the signs of a hydraulic problem on a boom lift?
Watch for slow or jerky boom movement, unusual noise from the pump, fluid leaking under the machine, overheating, and a spongy or unresponsive control response. Low fluid level, contaminated oil, air in the system, or worn seals can all cause these symptoms. Check fluid level and condition first, then inspect hoses, fittings, and cylinders for leaks. If symptoms continue after topping off fluid and checking for leaks, have a technician test system pressure and inspect internal components before the problem worsens.
Forklift or Lift Down Right Now?
Talk directly to an experienced technician, not a call center. Mobile repair for electric, LP and diesel forklifts, scissor lifts and boom lifts across the Sacramento area.
📞 Call (916) 827-0510